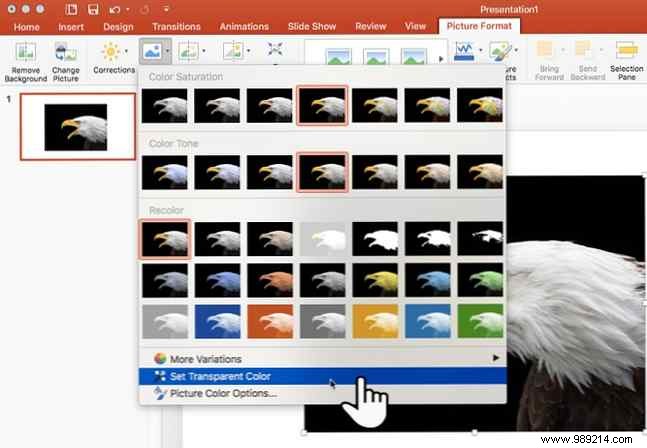
Microsoft PowerPoint has a little feature hidden in the ribbon called Set Transparent Color which can remove the background of an image and make it transparent . This tip is useful when you want to make infographics with PowerPoint How to Make a Free Infographic with PowerPoint How to Make a Free Infographic with PowerPoint You can create infographics easily and quickly with PowerPoint. PowerPoint is an undercover infographic design tool that requires very little effort to produce beautiful, high-quality graphics. Read More
This tip works only on embedded images. It does not I work for images within shapes. If your image is inserted into a shape as a fill, the Set Transparent Color option will not be available. Here's how to work it. The screenshots are from Office for Mac, but it's the same for Office on Windows.


The Set Transparent Color tool is not perfect. It is not as precise as the Eyedropper tool in Adobe Photoshop. It also gives you two more problems to address:
Not much can be done about problem number one. But there is a workaround for the second drawback:you can protect the same color in any area you don't want to see through.
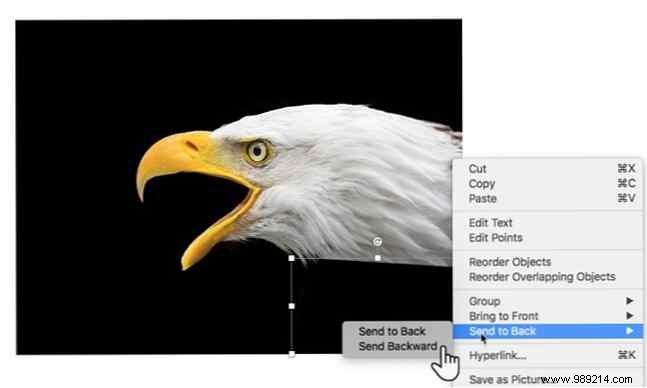
Draw a Free Form to cover the area of the image you want to keep that also contains the transparent color:

Fill this freeform shape with the color that was made transparent (black Here) and move it behind the front image but in front of the background. Right click on the shape and select Send to Back> Send to Back .
Next, set the transparent color.
In previous versions of PowerPoint, this feature worked only on PNG and GIF files. You can now do this even on PDF and JPEG images. Again, solid colors will give you the best results.
Want Microsoft to make color selection a bit more powerful? How to creatively set the transparent color in a PowerPoint image?